Saturday, August 24, 2013

Green pop nail design

Mans šīs dienas manikīrs. :)

Šim nagu dizainam nepieciešamaisBluesky shellac bāzes nagu laka un virskārta, sarkana (Bluesky Wildfire)  un zaļgana (Bluesky Green Veraman) shellac nagu laka, zaļi un sarkani nagu spīdumi, zaļi un sarkani nagu dizaina stikliņi.

Sākam ar manikīru un bāzes nagu laku. Uzklājam zaļo un sarkano nagu laku, pēc tam otro kārtu. Sajaucam spīdumus ar caurspīdīgu nagu laku (Bluesky top coat). Liekam virsū stikliņus un ar mazu otiņu spīdumus un nožāvējam UV lampā. Pēdējais solis ir virskārta (Bluesky top coat), 2 kārtas uzklājam uz nagiem ar dizainu. Notīrām lipīgo slāni, uzklājam eļļiņu. Un gatavs!


---

My current manicure. :)

For this nail design you'll needBluesky shellac base and top coat nail polish, red (Bluesky Wildfire) and greenish (Bluesky Green Veraman) shellac nail polish, red and green nail art glitter, red and green nail art glass.

We're starting with manicure and then Bluesky base coat. Then apply color nail polishes and cure, then apply the second color coat. Mix glitter with Bluesky top coat. Add nail art glass and with a small brush dot the glitter and cure with UV lamp. Last step - Bluesky top coat ( 2 coats on the nails with design). Remove the sticky layer and apply some oil on your nails. And you're done! 


Green pop & red manicure, Bluesky shellac nail design, nail art glass, nail glitter, manicure, manikīrs, sarkans, zaļš, spīdumi

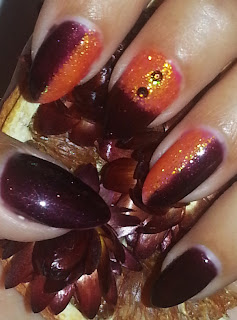
Dark Orange

Un tā turpinot izmantot spīdumus...tapa šāds nagu dizains.

Nepieciešamais: Bluesky shellac bāzes nagu laka un virskārta, tumši brūngana un oranža  shellac nagu laka, oranži nagu spīdumi un tumši brūni dimantiņi.

Viss kā jau vienmēr sākas ar manikīru, tad tiek uzklāta shellac bāzes nagu laka. Uzklāj brūnās (Bluesky Dark Lava) un oranžās (Bluesky Hot Chillis) nagu lakas pirmo kārtu, pēc tam otro kārtu. Sajauc oranžos spīdumus ar caurspīdīgu nagu laku ( Bluesky top coat) un liek virs oranžās nagu lakas, pievieno dimantiņus (Swarovski). Visbeidzot, uzklāj virskārtu (Bluesky top coat) (2 kārtas uz nagiem ar spīdumiem). Notīrām lipīgo slāni un uzklājam eļļiņu.

---

Continuing to use glitter...and look what I made.

You will need: Bluesky shellac base and top coat nail polish, dark brownish and orange shellac nail polish, orange nail art glitter and dark brown rhinestones.

As always everything starts with manicure, then you apply shellac base coat. After that you can apply the first coat of dark brown (Bluesky Dark Lava) and orange (Bluesky Hot Chillis) nail polish, then second coat. Mix orange glitter with Bluesky top coat and apply on the orange nail polish, add the brown rhinestones (Swarovski). Finally, apply Bluesky top coat (2 coats on the nails with glitter). Remove the sticky layer and apply some oil on your nails.


Dark Orange nail design, glitter, Swarovski rhinestones, shellac, Bluesky, Dark lava, Hot Chillis

Sunday, August 11, 2013

Shellac Neon Lavender nail polish

Čau!

Nesen Ebayā pamanīju šo nagu laku un nevarēju atturēties... :P Kā Jums patīk?

Šim nagu dizainam nepieciešams: Bluesky shellac bāzes nagu laka un virskārta, lavandas krāsas nagu laka, sudraba nagu laka, nagu uzlīmes.

1.) Sagatavo nagus shellac uzklāšanai.
2.) Uzklāj bāzes nagu laku (Bluesky shellac base coat) un nožāvē UV lampā.
3.) Uzklāj plānu kārtu nagu lakas (Bluesky Neon Lavender) un nožāvē, pēc tam uzklāj otru kārtu šīs pašas nagu lakas un nožāvē.
4.) Uz augšējām maliņām uzklāj sudraba nagu laku (Bluesky Silver Chrome) un nožāvē, atkārto vēlreiz.
5.) Uz akcenta naga uzliek kādu nagu uzlīmi, es izvēlējos ar zvaigznītēm.
6.) Uzklāj virskārtu (Bluesky top coat) un nožāvē UV lampā. Atkārto uz akcenta naga.
7.) Notīri Shellac nagu lakas lipīgo slāni ar izvēlēto līdzekli.

---
Hi!

Found this nail polish on Ebay and couldn't resist.. :P What do you think?

For this nail design, you'll need: Bluesky shellac base and top coat nail polish, lavender color nail polish, silver nail polish, nail stickers.

1.) Prepare the nails.
2.) Apply thin coat of base nail polish (Bluesky shellac base coat) and let it dry (cure with UV lamp).
3.) Apply a thin coat of nail polish (Bluesky Neon Lavender) and cure it, then repeat this step.
4.) Add silver color nail polish (Bluesky Silver Chrome) and cure it, repeat this step.
5.) Add a nail sticker on the accent nail, I chose sticker with stars.
6.) Apply top coat (Bluesky) and cure with UV lamp. Repeat this step on accent nail.
7.) Remove the sticky layer.


Shellac Bluesky Neon Lavender nails, shellac neona nagu dizains, Bluesky shellac, nail sticker, Silver Chrome

Pink glitter nails/ Mirdzoši rozā nagi

Vienkāršs nagu dizains, joprojām izmantojot spīdumus..

Nepieciešamais: Bluesky shellac bāzes nagu laka un virskārta, gaiša shellac nagu laka pamatam, rozā un gaiši nagu spīdumi un dimantiņi.

1.) Sagatavo nagus shellac uzklāšanai.
2.) Uzklāj bāzes nagu laku (Bluesky shellac base coat) un nožāvē UV lampā.
3.) Uzklāj plānu kārtu gaišās nagu lakas (Bluesky Romantique) un nožāvē. 
4.) Sajauc caurspīdīgu nagu laku (Bluesky top coat) ar rozā un gaišiem spīdumiem un uzklāj uz nagiem.Nožāvē UV lampā. Atkārto šo punktu un uzliec dimantiņus, nožāvē UV lampā.
5.) Uzklāj virskārtu (Bluesky top coat) un nožāvē. Atkārto vēlreiz.
6.) Notīri Shellac nagu lakas lipīgo slāni ar izvēlēto līdzekli. Uzklāj nagiem eļļiņu.

---

Easy nail design, still using glitter...

You will need: Bluesky shellac base and top coat nail polish, light color nail polish for base color, pink and clear nail art glitter and rhinestones.

1.) Prepare the nails.
2.) Apply thin coat of base nail polish (Bluesky shellac base coat) and let it dry (cure with UV lamp).
3.) Apply a coat of the lighter nail polish (Bluesky Romantique) and cure it.
4.) Mix pink and clear glitter with Bluesky top coat nail polish and apply to nails. Cure with UV lamp. Repeat this step and add rhinestones. Cure with UV lamp.
5.) Apply top coat on your nails and cure. Repeat this step.
6.) Remove the sticky layer and apply oil on your nails.


Pink glitter nails, mirdzoši rozā nagi, nagu spīdumi, Bluesky, Romantique, shellac

Saturday, July 20, 2013

Gold glitter & rhinestone nail design

Sveikas!

Jauns nagu dizains, izmantojot spīdumus (baigi iepatikušies :D ) un zelta dimantiņus.

Nepieciešamais: Bluesky shellac bāzes nagu laka un virskārta, gaiša shellac nagu laka pamatam, melna shellac nagu laka, zelta nagu spīdumi un dimantiņi.

1.) Sagatavo nagus shellac uzklāšanai.
2.) Uzklāj bāzes nagu laku (Bluesky shellac base coat) un nožāvē UV lampā.
3.) Uzklāj plānu kārtu gaišās nagu lakas (Bluesky Romantique) un nožāvē. Atkārto šo punktu.
4.) Slīpi līdz naga stūrim uzklāj melno nagu laku (Bluesky Black Pool) un nožāvē UV lampā. Atkārto šo punktu.
5.) Sajauc caurspīdīgu nagu laku (Bluesky top coat) ar zelta spīdumiem un uzklāj uz akcenta naga, kā arī pārējo nagu stūrīšiem (uz melnās nagu lakas zelta spīdumi izskatīsies zaļi). Nožāvē UV lampā. Atkārto šo punktu uz akcenta naga un pievieno zelta dimantiņus, nožāvē UV lampā.
6.) Uzklāj virskārtu (Bluesky top coat) uz visa naga (neaizmirsti arī nagu maliņas) un nožāvē. Atkārto vēlreiz.
7.) Notīri Shellac nagu lakas lipīgo slāni ar izvēlēto līdzekli. Uzklāj nagiem eļļiņu.

---

Hey!

New nail design using glitter (kinda loving them right now :D ) and gold rhinestones.

You will need: Bluesky shellac base and top coat nail polish, light color nail polish for base color, black shellac nail polish, gold nail art glitter and rhinestones.

1.) Prepare the nails.
2.) Apply thin coat of base nail polish (Bluesky shellac base coat) and let it dry (cure with UV lamp).
3.) Apply a coat of the lighter nail polish (Bluesky Romantique) and cure it. Repeat this step.
4.) Apply black nail polish from corner to the other side of the nail (Bluesky Black Pool) and cure it. Repeat this step.
5.) Mix gold glitter with Bluesky top coat nail polish and apply to accent nail and on the black nail polish corners (the gold glitter will look green). Cure with UV lamp. Repeat this step on accent nail and add gold rhinestones to the nails. Cure.
6.) Apply top coat (Bluesky) on your nails (don't forget the nail edge) and cure. Repeat this step.
7.) Remove the sticky layer and apply oil on your nails.


Gold glitter accent nail, black french manicure, zelta spīdumu manikīrs, nagu dizains, Bluesky shellac, rhinestones, Romantique, Black Pool

Wednesday, July 17, 2013

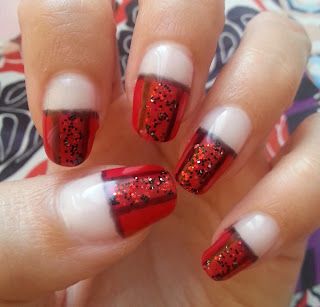
Red & glitter nail design

Vienkāršs sarkans ar melnu + spīdumi nagu dizains.

Lai izveidotu šādu dizainu, Tev būs nepieciešams: Bluesky shellac bāzes nagu laka un virskārta, gaiša shellac nagu laka pamatam, sarkana un melna shellac nagu laka, sarkani un melni nagu spīdumi.

1.) Sagatavo nagus shellac uzklāšanai.
2.) Uzklāj bāzes nagu laku (Bluesky shellac base coat) un nožāvē UV lampā.
3.) Uzklāj plānu kārtu gaišās nagu lakas (Bluesky Romantique) un nožāvē.
4.) Uzklāj sarkano nagu laku (Bluesky Wildfire), cik augstu vēlies, un nožāvē UV lampā. Atkārto šo punktu.
5.) Izmantojot  mazu nagu dizaina otiņu uzvelc melnas līnijas (Bluesky Black Pool) un nožāvē UV lampā.
6.) Sajauc caurspīdīgu nagu laku (Bluesky top coat) ar sarkaniem un melniem spīdumiem un uzklāj starp līnijām. Nožāvē UV lampā.
7.) Uzklāj virskārtu (Bluesky top coat) uz visa naga (neaizmirsti arī nagu maliņas) un nožāvē. Atkārto vēlreiz.
8.) Notīri Shellac nagu lakas lipīgo slāni ar izvēlēto līdzekli. Uzklāj nagiem eļļiņu.


---

Simple red & black + glitter nail design.

To create this nail design you'll need: Bluesky shellac base and top coat nail polish, light color nail polish for base color, red & black shellac nail polishes, red & black nail art glitter.

1.) Prepare the nails.
2.) Apply thin coat of base nail polish (Bluesky shellac base coat) and let it dry (cure with UV lamp).
3.) Apply a coat of the lighter nail polish (Bluesky Romantique) and cure it.
4.) Apply red nail polish (Bluesky Wildfire) and cure it. Repeat this step.
5.) Using nail design brush draw black lines (Bluesky Black Pool) and cure them.
6.) Mix red and black glitter with Bluesky top coat nail polish and apply in the middle. Cure with UV lamp.
7.) Apply top coat (Bluesky) on your nails (don't forget the nail edge) and cure. Repeat this step.
8.) Remove the sticky layer and apply oil on your nails.


shellac nail design, Bluesky, Wildfire, glitter, Black Pool, Romantique, red and black nail art

Thursday, June 27, 2013

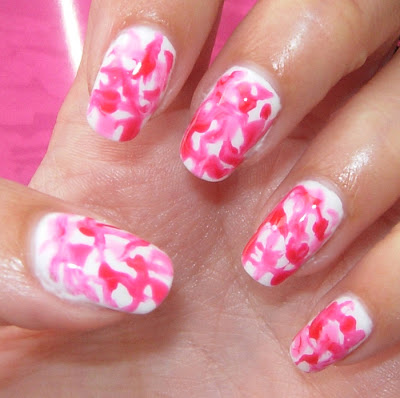
Krāsu mix nagu dizains/ Splash nail art

Čau!

Šonedēļ vēlējos gaišu, bet krāsainu nagu dizainu. Lūk, kas man sanāca. :)

Nepieciešamais: Bluesky shellac bāzes nagu laka un virskārta, gaiša shellac nagu laka pamatam, trīs līdzīgu toņu shellac nagu lakas.

1.) Sagatavo nagus shellac uzklāšanai.
2.) Uzklāj bāzes nagu laku (Bluesky shellac base coat) un nožāvē UV lampā.
3.) Uzklāj plānu kārtu gaišās nagu lakas (Bluesky Studio white) un nožāvē. Tad atkārto šo punktu vēlreiz.
4.) Ar nagu lakas otiņu saliec punktiņus, izmantojot 3 nagu lakas. Es izmantoju Bluesky Hot Chillis (sarkani oranžīga krāsa), Wildfire (klasiski sarkana), Gotchya (gaiši rozā). Izmantojot  mazu nagu dizaina otiņu sapludini krāsas un nožāvē UV lampā.
5.) Uzklāj virskārtu (Bluesky top coat) uz visa naga (neaizmirsti arī nagu maliņas) un nožāvē.
6.) Notīri Shellac nagu lakas lipīgo slāni ar izvēlēto līdzekli. Uzklāj nagiem eļļiņu.

---

Hey!

This week I wanted light, but colorful nail design, so this is what I came up with. :)

You'll need: Bluesky shellac base and top coat nail polish, light color nail polish for base color, three similar color shellac nail polishes.

1.) Prepare the nails.
2.) Apply thin coat of base nail polish (Bluesky shellac base coat) and let it dry (cure with UV lamp).
3.) Apply a coat of the lighter nail polish (Bluesky Studio White) and cure it, then repeat this step.
4.) Apply dots of your 3 nail polishes with nail polish brush. I used Bluesky Hot Chillis (watermelon color), Wildfire (classic red), Gotchya (bright baby pink). With small nail art brush mix the color dots and cure in UV lamp.
5.) Apply top coat (Bluesky) on your nails (don't forget the nail edge) and cure.
6.) Remove the sticky layer and apply oil on your nails.


Bluesky shellac nail polish, Studio white, Gotchya, Wildfire, Hot Chillis, colorful, shellac manikīrs, krāsains nagu dizains


Thursday, June 20, 2013

Vienkāršs nagu dizains/ Simple nail design

Sveikas!

Mans šīs nedēļas Shellac manikīrs - balts & zils nagu dizains.

Nepieciešamais: Bluesky shellac bāzes nagu laka un virskārta, gaiša shellac nagu laka pamatam, tumša shellac nagu laka un nagu spīdumi (pieskaņoti tumšajai nagu lakai).

1.) Sagatavo nagus shellac uzklāšanai (novīlēt, var nospodrināt ar nagu buferi utt.).
2.) Uzklāj bāzes nagu laku (Bluesky shellac base coat) un nožāvē UV lampā.
3.) Uzklāj plānu kārtu gaišas nagu lakas (Bluesky Studio White) un nožāvē, pēc tam uzklāj otru kārtu šīs pašas nagu lakas un nožāvē.
4.) Uzklāj tumšo nagu laku vēlamajā augstumā (Bluesky Midnight Swim) un nožāvē, atkārto vēlreiz.
5.) Sajauc uz lapiņas caurspīdīgu nagu laku (Bluesky top coat) ar ziliem nagu spīdumiem un uzklāj uz nagiem, nožāvē.
6.) Uzklāj virskārtu (Bluesky top coat) uz visa naga un nožāvē UV lampā.
7.) Notīri Shellac nagu lakas lipīgo slāni ar izvēlēto līdzekli.
8.) Uzklāj uz nagiem eļļu (es lietoju mandeļu eļļu vai bišu vaskus, kas nopērkami Drogās).

---

Hi!

This weeks Shellac manicure - white & blue nail design.

You'll need: Bluesky shellac base and top coat nail polish, light color nail polish for base color, darker shellac nail polish and nail glitter (matching the darker nail polish).

1.) Prepare the nails (manicure, cuticles, buff them etc.).
2.) Apply thin coat of base nail polish (Bluesky shellac base coat) and let it dry (cure with UV lamp).
3.) Apply a coat of the lighter nail polish (Bluesky Studio White) and cure it, then repeat this step.
4.) Apply the darker nail polish (Bluesky Midnight Swim) and cure it, repeat this step.
5.) Mix clear nail polish (Bluesky top coat) with nail glitters and apply on the dark nail polish, cure it.
6.) Apply top coat (Bluesky) on your nails and cure with UV lamp.
7.) Remove the sticky layer.
8.) Apply oil on your finished nails (I'm using almond oil).


white & blue nail design, Blats & zils nagu dizains, shellac, Bluesky, Midnight Swim, Studio White, glitter

Tuesday, June 18, 2013

Crest Whitestrips

Čau!

Šodien nolēmu padalīties savā pieredzē ar zobu balināšanas produktiem - Crest whitestrips.

Šobrīd izmēģinu Crest Whitestrips 2-Hour Express. Varat palasīt par šo produktu ŠEIT
Esmu izmēģinājusi arī Crest Whitestrips Classic un Crest Whitestrips Professional Effects (ŠEIT). 

Crest Whitestrips Classic esmu lietojusi kaut kad ļoti senā pagātnē, pat nezinu, vai viņus vispār vēl pārdod. Balināšanas efekts bija normāls, tomēr man nepatika, ka viņus bija bieži jāliek un nebija Advanced seal tehnoloģija, līdz ar to viņi šļūca uz visām pusēm...

Crest Whitestrips Professional Effects biju izmēģinājusi kādu gadu (vai divus) atpakaļ. Un šie man ļoti patika, jo Advanced seal tehnoloģija padarīja zobu balināšanu bezrūpīgu un patīkamāku, jo plāksnītes cieši turējās pie zobiem un nekur neslīdēja. Professional Effects jālieto 1x dienā uz 30 min. Nav tik traki.. Zobu jutīgums bija manāms pirmajās dienās, bet pēc tam mazinājās. Nevaru teikt, ka es redzēju rezultātus pēc 14 dienām, bet pēc 20 dienām bija manāmi baltāki zobi.

Crest Whitestrips 2-Hour Express esmu lietojusi 2 reizes (it kā ir paredzēts lietot 4 paciņas gada laikā). Izvēlējos izmēģināt tieši šos, jo šķita, ka 2 stundas pasēdēt ar zobu balināšanas plāksnītēm ik pa 3 mēnešiem taču ir easy. Šim produktam arī ir Advanced seal, tāpēc pa šīm 2 stundām viņi nekur nepazūd, kas ir labi, beeet pēc otrās balināšanas reizes (ar apmēram 2 mēnešu intervālu) nav manāmi īpaši rezultāti. Cerēju, ka ietaupīšu laiku, un nebūs jāmokās 20 dienas liekot tos katru vakaru kā ar citiem Crest Whitestrips, bet beigās palieku bez rezultātiem (tikai ar 2 dienu ilgām zobu sāpēm).

Secinājumi: Laikam būs jāatgriežas pie vecajiem labajiem Crest Whitestrips, piemēram, Professional Effects.. Neiesaku 2-Hour Express, ja nepieciešams dramatisks balināšanas efekts (laikam neiesaku arī vispār, vismaz man no 2x lietošanas nebija nekādas jēgas). 

Ja Jums ir kādi jautājumi par Crest Whitestrips, droši rakstiet komentāros. ;)

---

Hey!

Today I decided to write about teeth whitening products - Crest Whitestrips.

At the moment, I'm testing out Crest Whitestrips 2-Hour Express. You can read about it HERE. Also I've tried Crest Whitestrips Classic and Crest Whitestrips Professional Effects (HERE).

Crest Whitestrips Classic I used a long time ago, I don't even know whether they're still in the market. The results were OK, but I didn't like that I had to use them very often and they didn't have Advanced seal technology, so they moved around in my mouth...

Crest Whitestrips Professional Effects I tried them one (or two) years back. And I really liked these ones. Advanced seal technology made tooth whitening carefree and easy, because the strips didn't move around. You need to apply them only once a day for 30 min. That's not so bad.. My teeth were a bit sensitive in the first days, but later it diminished. I didn't quite see the results in 14 days, but they were noticeably whiter after 20 days or so.

Crest Whitestrips 2-Hour Express I've used them 2 times (4 packages (8 strips) should last for a year). I decided to try these, because I thought that sitting with whitestrips once in 3 months for 2 hours is nothing compared to regular whitestrips. This also has Advanced seal, which is good, because it doesn't budge in 2 hours, but after the second application (with 2 month interval) I don't see any noticeable results. I thought that I would save time using these strips instead of regular whitestrips (the ones you should use for 20 days), but at the end I'm left without results (only teeth ache for 2 days).

Conclusion: Well, I guess I'll return to the regular Crest Whitestrips like Professional Effects. I don't recommend Crest 2-Hour Express whitestrips if you are looking for dramatic results (or I don't even recommend them at all, at least I had no major results after 2 applications).

If you have any questions about Crest Whitestrips, feel free to comment. ;)

Saturday, June 8, 2013

Vēlies mirdzošu ādu?/ Glowing skin

Sveikas!

Vasarā mēs vēlamies parādīt savas daiļās kājiņas un staigāt īsos svārciņos un kleitiņās, tāpēc jāparūpējas, lai mūsu āda būtu gluda un mirdzoša. Tādēļ es nolēmu uzrakstīt par dažiem produktiem, ko esmu izmēģinājusi, lai iegūtu gludu un spīdīgu ādu.


---

Hello!

In summer we all want to show our beautiful legs and wear mini skirts or dresses, because of that we need to take care of our skin, so it would be soft and with a nice glow. That's why I decided to write about some products, that I've tried to get soft and shiny skin.


---


MADARA FLOWER DUST LOTION

Madara flower dust lotion, glowing skin lotion

Ļoti labs variants, ja meklē netaukainu losjonu ar spīdumu (ar zelta spīdumiem). Nedaudz var just, ka āda ir mitrināta un ir redzams ļoti skaists zelta spīdums. Neliels trūkums ir smarža, jo šis losjons smaržo pēc nezālēm, bet (par laimi!) šī smarža ļoti ātri pazūd un vairs nav jūtama. Toties no šī izriet neliels pluss -  produkts ir dabīgs. Vēl viens mīnusiņš ir cena - 14.95 Ls par 150 ml...
Atkarībā no tā, kas tiek darīts pa dienu, spīdums ir redzams apmēram 6-8 stundas. Vai nav forši?!

Losjonu var apskatīt ŠEIT! (Man ir mazais iepakojums, tāpēc zaļa tūbiņa.)

Zemāk ir ievietotas bildes, kā losjons izskatās uz ādas (viena ar zibspuldzi, otra bez).

---

Very good product, if your looking for a lotion that's not greasy and is with a golden glow (contains gold powder dust). After applying you can feel that skin is a bit moisturized and you have a really beautiful golden glow. One con of this product is it's aroma - smells like weeds, bet fortunately it disappears very quickly. But it has a little plus - it's an organic product. Another con is it's price - about 30$ for 150 ml lotion..
Depends on what your doing during the day, but the glow is visible for about 6-8 hours. How cool is that?!

You can check it out HERE! (I have a small size lotion, that's why I have green packaging.)

Below you can see pictures how it looks on skin (one with flash, other without).


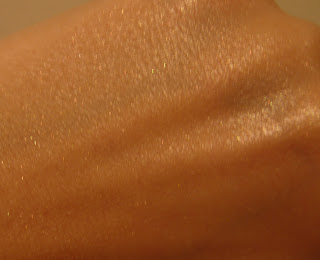
Madara powder dust lotion swatch with flash

Madara powder dust lotion swatch without flash

---

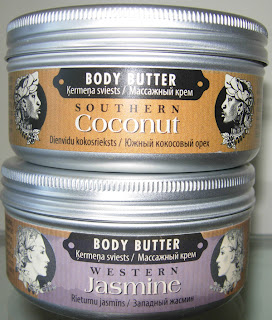
STENDERS BODY BUTTER

Stenders body butter, Southern coconut, Western jasmine

Jums patiks šis produkts, ja meklējat tiešām ļoti mitrinošu ķermeņa krēmu. Šis gan ir ķermeņa sviests un tikai 70 g, bet pietiek ar nelielu daudzumu produkta, lai iesmērētu vēlamās ķermeņa daļas. Stendera ķermeņa sviestam ir 4 dažādi varianti (vismaz veikalā bija 4), manuprāt, vislabāk smaržo Dienvidu kokosriekstu (gluži nesmaržo pēc kokosrieksta, liekas ar nedaudz citrusaugļu smaržu), Rietumu jasmīns liekas pārāk stipra un tāda specifiska smarža..
Pēc uzsmērēšanas āda ir ļoti gluda un mīksta, kā arī spīdīga (produkts ir bez zelta spīdumiem). Vienīgais mīnus, ja Jums nepatīk taukainības sajūta, tad šis ķermeņa sviests nav priekš Jums, jo pieskaroties ir jūtams, ka āda ir eļļaina. Apmēram pēc 4 stundām vēl nedaudz ir jūtama smarža (kādu laiku pēc uzsmērēšanas smaržu varēs sajust pat blakusesošie). Ķermeņa sviesta esamība ir jūtama apmēram 6-10 stundas. Šis ir mans otrs mīļākais produkts (aiz Madaras losjona).


Stendera ķermeņa sviestus var aplūkot ŠEIT!

Un zemāk bildes..

---

You'll like this product, if your looking for a really moisturizing body lotion. This one is a body butter and only 70 grams, but for this product a little goes a long way.. This type of Stenders body butter has 4 options. In my opinion the better smelling one is the Southern coconut body butter, Western jasmine smells very specific and seems a bit strong for my taste.
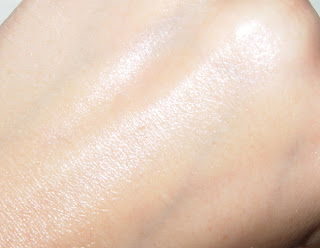
After applying your skin is very soft, smooth and glowing (product doesn't contain gold powder dust). Only con is that it's pretty greasy, because when you touch your skin you can feel the oiliness. After about 4 hours you still can feel the smell (some while after applying even others around you will be able to smell it). You can feel that the body butter is still on for about 6-10 hours. This is my second favourite product (after Madaras flower dust lotion).

You can check out Stendrs body butters HERE!

And pictures with the body butter..


Stenders body butter swatch with flash

Stenders body butter swatch without flash

---

AVON SKIN SO SOFT SHIMMERING BODY OIL SPRAY


Šis produkts ir domāts tām, kurām labāk patīk izsmidzināmie līdzekļi un zelta spīdums. Tas nav manu mīļāko produktu sarakstā, bet, tā kā esmu viņu kādu laiku lietojusi, nolēmu arī iekļaut šajā rakstā. Pirmkārt, smarža nav īpaši smuka.. Otrkārt, ar šo āda ir ļoti taukaina, ar Stendera ķermeņa sviestu arī, bet viņš vismaz labi smaržo un ir noturīgs. Vienīgais, kas man patika, bija tas, ka var redzēt jauku zeltainu spīdumu uz ādas. Noturības ziņā pazūd ātrāk par Stendera ķermeņa sviestu (apmēram 3-5 stundās). Vienīgais, ka cena ir zemāka nekā iepriekšminētajiem produktiem, ja gadījumā vajag kādu pavisam ekonomisku produktu ikdienai..

Zemāk bildes ar Avona ķermeņa eļļu.
---

This product is suitable for those who prefer spray products with golden glow (with golden dust powder). It's not in my favourite product list, but because I've used it for some time, I decided to include it in this post. First, let my just say that the smell isn't that nice.. Second, skin feels very oily, it's also oily with Stenders body butter, but the body butter at least smells nice and the staying power is better. This spray is gone in about 3-5 hours. Only pro is that it's cheaper than the above mentioned products, in case you need a really inexpensive product for daily use..

See pictures below..

Avon Skin so soft shimmering body oil spray swatch with flash

Avon Skin so soft shimmering body oil spray swatch without flash

---

Cerams kaut kas noderēja ideālā mirdzošas ādas produkta meklējumos.. :)


---

Hope this helps in search for the perfect glowing skin product.. :)


Wednesday, June 5, 2013

Rozā nagu dizains/ Pink nail design

Čau visiem!

Beidzot ir pienācis tas brīdis, kad var ķerties klāt interesantākajai daļai par Shellac manikīru - nagu krāsošanai!

Šis ir mans pirmais raksts par Shellac nagu lakas uzklāšanu, tāpēc pastāstīšu kā tas jādara soli pa solim.


---

Hello all!

Finally we can  get to the interesting part about Shellac manicure - applying.

This is my first post about how to apply Shellac nail polish, so I'll give you step by step instructions.


---


1.solis/ Step 1.

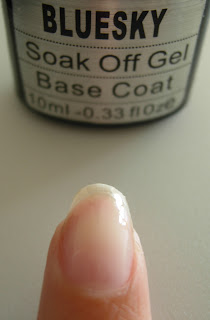
Bluesky shellac base coat, shellac bāzes nagu laka

Uz tīra naga uzklājam plānu kārtu Bluesky shellac bāzes nagu lakas. Svarīgi nagu laku klāt, lai tā nepieskartos  ādai (atstājot nelielas nenokrāsotas maliņas nagu augšpusē un sānos). Uzklājam nagu laku arī uz nagu galiem (tas attiecas uz visiem nagu lakas slāņiem, kurus jākrāso). Tad liekam nagus UV lampā uz 2 min (LED lampā uz 30-60 s).

---

Apply thin layer of Bluesky shellac base coat to clean nails. It's important to paint all nail polish layers so that it doesn't touch your skin. Also apply nail polish to the nail edge (this is required for all nail polish layers you'll apply). Cure it for 2 min with UV lamp (30-60 s with LED lamp).


shellac curing, UV lamp

2.solis/ Step 2.

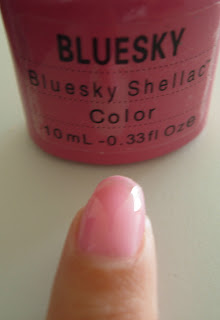
Bluesky shellac nail polish Gotchya, shellac nagu laka

Uzklājam plānu kārtu Bluesky shellac krāsainās nagu lakas. (Uzmanīgi nepieskaroties ādai!) Es izmantoju Bluesky shellac nagu laku "Gotchya". Un liekam UV lampā.

---

Apply thin layer of Bluesky shellac color nail polish. (Careful not to touch your skin!) I'm using Bluesky shellac nail polish "Gotchya". And cure with UV lamp.

---

3.solis/ Step 3.

Bluesky shellac nail polish Gotchya second layer

Uzklājam otru kārtu krāsainās nagu lakas. Un atkal liekam UV lampā uz 2 min.

---

Apply second layer of color nail polish. And again cure for 2 min with UV lamp.

---

4.solis/ Step 4.

Bluesky nail polish Gotchya and Studio white

Uzvelkam strīpas ar Bluesky shellac nagu laku "Studio white". Un liekam nagus UV lampā.

---

Draw lines with Bluesky nail polish "Studio white". And cure with UV lamp.

---

5.solis/ Step 5.

Bluesky top coat, virskārta

Uzklājam pēdējo nagu lakas kārtu - virskārtu. Šo kārtu klājam nedaudz biezāku. Un pēdējo reizi liekam UV lampā. Padoms: Ērtāk vispirms nokrāsot vienas rokas nagus un tad ķerties klāt otrai rokai.

---

Apply the last nail polish coat - Bluesky top coat. This layer can be a bit thicker than the last ones. And cure for the last time with UV lamp. Tip: It's better to finish applying shellac to one hand and then start painting the other hand.

---

6.solis/ Step 6.

Bluesky shellac Gotcha after curing, shellac nagu lakas lipīgā slāņa noņemšana

Notīrām nagus ar lipīgā slāņa noņēmēju (IBD Gelac gel cleanser vai jebkādu citu).

---

Wipe off the sticky layer using IBD Gelac gel cleanser (or any other brand you choose).

---

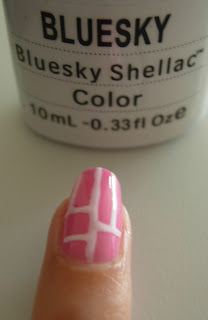
Rezultāts!/ Result!

Bluesky shellac nail design, nail art, pink with white stripes, nagu dizains, rozā, baltas svītras

Tuesday, June 4, 2013

Kā noņemt Shellac nagu laku/ How to remove Shellac nail polish

Sveikas!

Jums droši vien interesē kā pašām noņemt Shellac nagu laku, ja neliekat pašas, tad kaut vai, lai nebūtu papildus jāmaksā salonos par nagu lakas noņemšanu. Neuztraucieties, es Jums parādīšu! (P.S. Es lietoju Bluesky shellac nagu lakas)

---

Hi!

If your just starting to do your own Shellac manicure, your probably interested how to remove Shellac nail polish. Or maybe because you don't want to pay extra for Shellac nail polish removal at beauty salons. Well, don't worry, I'll show you how to do it! (P.S. I'm using Bluesky shellac nail polishes)


---

Shellac nagu lakas noņemšanai nepieciešams:
  • soak-off gēla nagu laku noņēmējs,
  • vates plāksnītes,
  • alumīnija folija,
  • manikīra kociņš.

---

To remove Shellac nail polish you need:
  • soak-off gel nail polish remover,
  • cotton sheets,
  • aluminium foil,
  • manicure stick.
---


1. solis / Step 1.


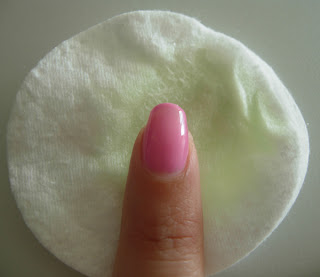
shellac removal, IBD gelac gel remover, shellac nagu lakas noņemšanashellac nail polish removal

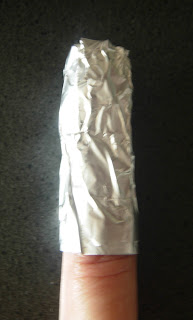
Shellac noņemšanu sākam, izmantojot, IBD Gelac nagu lakas noņēmēju. Piesūcinām sagriezto vates plāksnīti ar noņēmēju, un stingri ietinam pirkstu folijā. Šajā bezpalīdzīgajā situācijā jāsēž apmēram 15-20 min (Padoms: pa virsu var uzvilkt gumijas cimdus, lai labāks efekts un vieglāka noņemšana, ar gumijas cimdiem noņēmējs jātur ~15 min). Ir diezgan grūti (bet ne neiespējami) satīt otras rokas pirkstus, tāpēc ir vērts griezties pēc palīdzības, vai arī uzvilkt gumijas cimdu un tad tīt otras rokas pirkstus.


---

First you have to apply IBD Gelac gel remover to cotton sheet and wrap your finger in aluminium foil for about 15-20 min (Tip: you can wear rubber gloves, it'll make the removal easier, with gloves hold gel remover for ~15 min). It's a bit tricky (but not impossible) to get other hands fingers wrapped, so it's best to get some help or wear rubber glove on already wrapped hand.


 ---

2.solis / Step 2.


shellac nagu lakas noņemšana, shellac nail polish removal

Stingri satveram foliju un paberzējot novelkam no pirksta. Pēc tam atlikušo nagu laku nokasām ar manikīra kociņu. Ja nagu laka labi nenāk nost, var samitrināt vates plāksnīti ar noņēmēju un nedaudz paturēt uz naga, lai samitrinās.

---

Grab your finger and slowly rubbing remove the foil. Scrape off remaining nail polish with manicure stick. If it's hard to get some places off, you can put cotton sheet with gel remover on your nail.

---

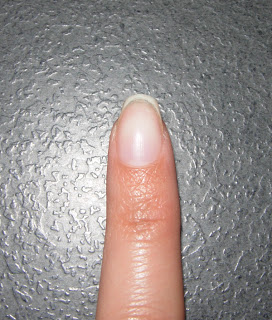
Gatavs! / Done!

nail after removing shellac nail polish, nags pēc shellac nagu lakas noņemšanas

Un gatavs! Atliek tik veikt manikīru un nags ir gatavs jaunas Shellac nagu lakas uzklāšanai.


---

Your done! Now you have to do your regular manicure and your nails are ready for a new Shellac manicure!


---

Tas arī viss, ļoti vienkārši, bet aizņem kādu laiciņu.. :)

---

That's all. Very easy to do, but takes time. :)