Showing posts with label nail art. Show all posts

Saturday, August 24, 2013

Green pop nail design

Mans šīs dienas manikīrs. :)

Šim nagu dizainam nepieciešamaisBluesky shellac bāzes nagu laka un virskārta, sarkana (Bluesky Wildfire)  un zaļgana (Bluesky Green Veraman) shellac nagu laka, zaļi un sarkani nagu spīdumi, zaļi un sarkani nagu dizaina stikliņi.

Sākam ar manikīru un bāzes nagu laku. Uzklājam zaļo un sarkano nagu laku, pēc tam otro kārtu. Sajaucam spīdumus ar caurspīdīgu nagu laku (Bluesky top coat). Liekam virsū stikliņus un ar mazu otiņu spīdumus un nožāvējam UV lampā. Pēdējais solis ir virskārta (Bluesky top coat), 2 kārtas uzklājam uz nagiem ar dizainu. Notīrām lipīgo slāni, uzklājam eļļiņu. Un gatavs!


---

My current manicure. :)

For this nail design you'll needBluesky shellac base and top coat nail polish, red (Bluesky Wildfire) and greenish (Bluesky Green Veraman) shellac nail polish, red and green nail art glitter, red and green nail art glass.

We're starting with manicure and then Bluesky base coat. Then apply color nail polishes and cure, then apply the second color coat. Mix glitter with Bluesky top coat. Add nail art glass and with a small brush dot the glitter and cure with UV lamp. Last step - Bluesky top coat ( 2 coats on the nails with design). Remove the sticky layer and apply some oil on your nails. And you're done! 


Green pop & red manicure, Bluesky shellac nail design, nail art glass, nail glitter, manicure, manikīrs, sarkans, zaļš, spīdumi

Dark Orange

Un tā turpinot izmantot spīdumus...tapa šāds nagu dizains.

Nepieciešamais: Bluesky shellac bāzes nagu laka un virskārta, tumši brūngana un oranža  shellac nagu laka, oranži nagu spīdumi un tumši brūni dimantiņi.

Viss kā jau vienmēr sākas ar manikīru, tad tiek uzklāta shellac bāzes nagu laka. Uzklāj brūnās (Bluesky Dark Lava) un oranžās (Bluesky Hot Chillis) nagu lakas pirmo kārtu, pēc tam otro kārtu. Sajauc oranžos spīdumus ar caurspīdīgu nagu laku ( Bluesky top coat) un liek virs oranžās nagu lakas, pievieno dimantiņus (Swarovski). Visbeidzot, uzklāj virskārtu (Bluesky top coat) (2 kārtas uz nagiem ar spīdumiem). Notīrām lipīgo slāni un uzklājam eļļiņu.

---

Continuing to use glitter...and look what I made.

You will need: Bluesky shellac base and top coat nail polish, dark brownish and orange shellac nail polish, orange nail art glitter and dark brown rhinestones.

As always everything starts with manicure, then you apply shellac base coat. After that you can apply the first coat of dark brown (Bluesky Dark Lava) and orange (Bluesky Hot Chillis) nail polish, then second coat. Mix orange glitter with Bluesky top coat and apply on the orange nail polish, add the brown rhinestones (Swarovski). Finally, apply Bluesky top coat (2 coats on the nails with glitter). Remove the sticky layer and apply some oil on your nails.


Dark Orange nail design, glitter, Swarovski rhinestones, shellac, Bluesky, Dark lava, Hot Chillis

Saturday, July 20, 2013

Gold glitter & rhinestone nail design

Sveikas!

Jauns nagu dizains, izmantojot spīdumus (baigi iepatikušies :D ) un zelta dimantiņus.

Nepieciešamais: Bluesky shellac bāzes nagu laka un virskārta, gaiša shellac nagu laka pamatam, melna shellac nagu laka, zelta nagu spīdumi un dimantiņi.

1.) Sagatavo nagus shellac uzklāšanai.
2.) Uzklāj bāzes nagu laku (Bluesky shellac base coat) un nožāvē UV lampā.
3.) Uzklāj plānu kārtu gaišās nagu lakas (Bluesky Romantique) un nožāvē. Atkārto šo punktu.
4.) Slīpi līdz naga stūrim uzklāj melno nagu laku (Bluesky Black Pool) un nožāvē UV lampā. Atkārto šo punktu.
5.) Sajauc caurspīdīgu nagu laku (Bluesky top coat) ar zelta spīdumiem un uzklāj uz akcenta naga, kā arī pārējo nagu stūrīšiem (uz melnās nagu lakas zelta spīdumi izskatīsies zaļi). Nožāvē UV lampā. Atkārto šo punktu uz akcenta naga un pievieno zelta dimantiņus, nožāvē UV lampā.
6.) Uzklāj virskārtu (Bluesky top coat) uz visa naga (neaizmirsti arī nagu maliņas) un nožāvē. Atkārto vēlreiz.
7.) Notīri Shellac nagu lakas lipīgo slāni ar izvēlēto līdzekli. Uzklāj nagiem eļļiņu.

---

Hey!

New nail design using glitter (kinda loving them right now :D ) and gold rhinestones.

You will need: Bluesky shellac base and top coat nail polish, light color nail polish for base color, black shellac nail polish, gold nail art glitter and rhinestones.

1.) Prepare the nails.
2.) Apply thin coat of base nail polish (Bluesky shellac base coat) and let it dry (cure with UV lamp).
3.) Apply a coat of the lighter nail polish (Bluesky Romantique) and cure it. Repeat this step.
4.) Apply black nail polish from corner to the other side of the nail (Bluesky Black Pool) and cure it. Repeat this step.
5.) Mix gold glitter with Bluesky top coat nail polish and apply to accent nail and on the black nail polish corners (the gold glitter will look green). Cure with UV lamp. Repeat this step on accent nail and add gold rhinestones to the nails. Cure.
6.) Apply top coat (Bluesky) on your nails (don't forget the nail edge) and cure. Repeat this step.
7.) Remove the sticky layer and apply oil on your nails.


Gold glitter accent nail, black french manicure, zelta spīdumu manikīrs, nagu dizains, Bluesky shellac, rhinestones, Romantique, Black Pool

Wednesday, July 17, 2013

Red & glitter nail design

Vienkāršs sarkans ar melnu + spīdumi nagu dizains.

Lai izveidotu šādu dizainu, Tev būs nepieciešams: Bluesky shellac bāzes nagu laka un virskārta, gaiša shellac nagu laka pamatam, sarkana un melna shellac nagu laka, sarkani un melni nagu spīdumi.

1.) Sagatavo nagus shellac uzklāšanai.
2.) Uzklāj bāzes nagu laku (Bluesky shellac base coat) un nožāvē UV lampā.
3.) Uzklāj plānu kārtu gaišās nagu lakas (Bluesky Romantique) un nožāvē.
4.) Uzklāj sarkano nagu laku (Bluesky Wildfire), cik augstu vēlies, un nožāvē UV lampā. Atkārto šo punktu.
5.) Izmantojot  mazu nagu dizaina otiņu uzvelc melnas līnijas (Bluesky Black Pool) un nožāvē UV lampā.
6.) Sajauc caurspīdīgu nagu laku (Bluesky top coat) ar sarkaniem un melniem spīdumiem un uzklāj starp līnijām. Nožāvē UV lampā.
7.) Uzklāj virskārtu (Bluesky top coat) uz visa naga (neaizmirsti arī nagu maliņas) un nožāvē. Atkārto vēlreiz.
8.) Notīri Shellac nagu lakas lipīgo slāni ar izvēlēto līdzekli. Uzklāj nagiem eļļiņu.


---

Simple red & black + glitter nail design.

To create this nail design you'll need: Bluesky shellac base and top coat nail polish, light color nail polish for base color, red & black shellac nail polishes, red & black nail art glitter.

1.) Prepare the nails.
2.) Apply thin coat of base nail polish (Bluesky shellac base coat) and let it dry (cure with UV lamp).
3.) Apply a coat of the lighter nail polish (Bluesky Romantique) and cure it.
4.) Apply red nail polish (Bluesky Wildfire) and cure it. Repeat this step.
5.) Using nail design brush draw black lines (Bluesky Black Pool) and cure them.
6.) Mix red and black glitter with Bluesky top coat nail polish and apply in the middle. Cure with UV lamp.
7.) Apply top coat (Bluesky) on your nails (don't forget the nail edge) and cure. Repeat this step.
8.) Remove the sticky layer and apply oil on your nails.


shellac nail design, Bluesky, Wildfire, glitter, Black Pool, Romantique, red and black nail art

Thursday, June 20, 2013

Vienkāršs nagu dizains/ Simple nail design

Sveikas!

Mans šīs nedēļas Shellac manikīrs - balts & zils nagu dizains.

Nepieciešamais: Bluesky shellac bāzes nagu laka un virskārta, gaiša shellac nagu laka pamatam, tumša shellac nagu laka un nagu spīdumi (pieskaņoti tumšajai nagu lakai).

1.) Sagatavo nagus shellac uzklāšanai (novīlēt, var nospodrināt ar nagu buferi utt.).
2.) Uzklāj bāzes nagu laku (Bluesky shellac base coat) un nožāvē UV lampā.
3.) Uzklāj plānu kārtu gaišas nagu lakas (Bluesky Studio White) un nožāvē, pēc tam uzklāj otru kārtu šīs pašas nagu lakas un nožāvē.
4.) Uzklāj tumšo nagu laku vēlamajā augstumā (Bluesky Midnight Swim) un nožāvē, atkārto vēlreiz.
5.) Sajauc uz lapiņas caurspīdīgu nagu laku (Bluesky top coat) ar ziliem nagu spīdumiem un uzklāj uz nagiem, nožāvē.
6.) Uzklāj virskārtu (Bluesky top coat) uz visa naga un nožāvē UV lampā.
7.) Notīri Shellac nagu lakas lipīgo slāni ar izvēlēto līdzekli.
8.) Uzklāj uz nagiem eļļu (es lietoju mandeļu eļļu vai bišu vaskus, kas nopērkami Drogās).

---

Hi!

This weeks Shellac manicure - white & blue nail design.

You'll need: Bluesky shellac base and top coat nail polish, light color nail polish for base color, darker shellac nail polish and nail glitter (matching the darker nail polish).

1.) Prepare the nails (manicure, cuticles, buff them etc.).
2.) Apply thin coat of base nail polish (Bluesky shellac base coat) and let it dry (cure with UV lamp).
3.) Apply a coat of the lighter nail polish (Bluesky Studio White) and cure it, then repeat this step.
4.) Apply the darker nail polish (Bluesky Midnight Swim) and cure it, repeat this step.
5.) Mix clear nail polish (Bluesky top coat) with nail glitters and apply on the dark nail polish, cure it.
6.) Apply top coat (Bluesky) on your nails and cure with UV lamp.
7.) Remove the sticky layer.
8.) Apply oil on your finished nails (I'm using almond oil).


white & blue nail design, Blats & zils nagu dizains, shellac, Bluesky, Midnight Swim, Studio White, glitter

Wednesday, June 5, 2013

Rozā nagu dizains/ Pink nail design

Čau visiem!

Beidzot ir pienācis tas brīdis, kad var ķerties klāt interesantākajai daļai par Shellac manikīru - nagu krāsošanai!

Šis ir mans pirmais raksts par Shellac nagu lakas uzklāšanu, tāpēc pastāstīšu kā tas jādara soli pa solim.


---

Hello all!

Finally we can  get to the interesting part about Shellac manicure - applying.

This is my first post about how to apply Shellac nail polish, so I'll give you step by step instructions.


---


1.solis/ Step 1.

Bluesky shellac base coat, shellac bāzes nagu laka

Uz tīra naga uzklājam plānu kārtu Bluesky shellac bāzes nagu lakas. Svarīgi nagu laku klāt, lai tā nepieskartos  ādai (atstājot nelielas nenokrāsotas maliņas nagu augšpusē un sānos). Uzklājam nagu laku arī uz nagu galiem (tas attiecas uz visiem nagu lakas slāņiem, kurus jākrāso). Tad liekam nagus UV lampā uz 2 min (LED lampā uz 30-60 s).

---

Apply thin layer of Bluesky shellac base coat to clean nails. It's important to paint all nail polish layers so that it doesn't touch your skin. Also apply nail polish to the nail edge (this is required for all nail polish layers you'll apply). Cure it for 2 min with UV lamp (30-60 s with LED lamp).


shellac curing, UV lamp

2.solis/ Step 2.

Bluesky shellac nail polish Gotchya, shellac nagu laka

Uzklājam plānu kārtu Bluesky shellac krāsainās nagu lakas. (Uzmanīgi nepieskaroties ādai!) Es izmantoju Bluesky shellac nagu laku "Gotchya". Un liekam UV lampā.

---

Apply thin layer of Bluesky shellac color nail polish. (Careful not to touch your skin!) I'm using Bluesky shellac nail polish "Gotchya". And cure with UV lamp.

---

3.solis/ Step 3.

Bluesky shellac nail polish Gotchya second layer

Uzklājam otru kārtu krāsainās nagu lakas. Un atkal liekam UV lampā uz 2 min.

---

Apply second layer of color nail polish. And again cure for 2 min with UV lamp.

---

4.solis/ Step 4.

Bluesky nail polish Gotchya and Studio white

Uzvelkam strīpas ar Bluesky shellac nagu laku "Studio white". Un liekam nagus UV lampā.

---

Draw lines with Bluesky nail polish "Studio white". And cure with UV lamp.
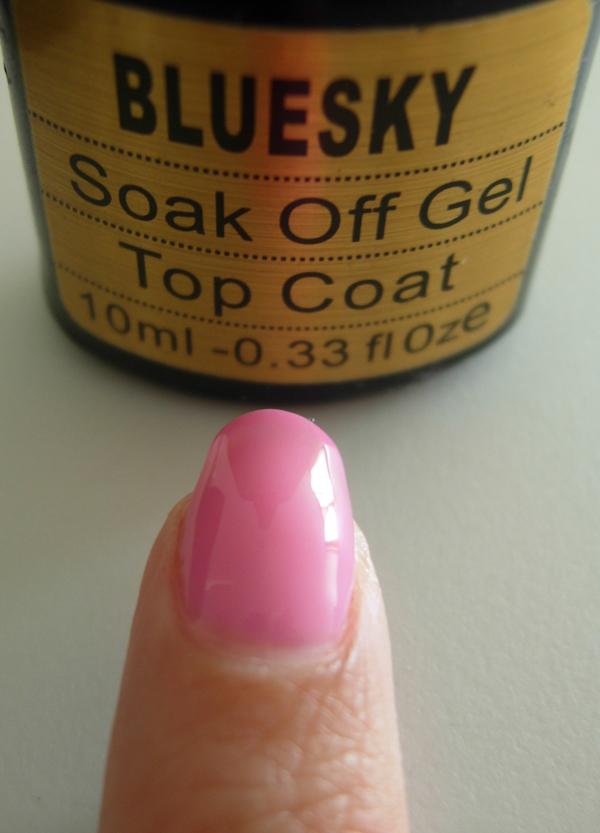
---

5.solis/ Step 5.

Bluesky top coat, virskārta

Uzklājam pēdējo nagu lakas kārtu - virskārtu. Šo kārtu klājam nedaudz biezāku. Un pēdējo reizi liekam UV lampā. Padoms: Ērtāk vispirms nokrāsot vienas rokas nagus un tad ķerties klāt otrai rokai.

---

Apply the last nail polish coat - Bluesky top coat. This layer can be a bit thicker than the last ones. And cure for the last time with UV lamp. Tip: It's better to finish applying shellac to one hand and then start painting the other hand.

---

6.solis/ Step 6.

Bluesky shellac Gotcha after curing, shellac nagu lakas lipīgā slāņa noņemšana

Notīrām nagus ar lipīgā slāņa noņēmēju (IBD Gelac gel cleanser vai jebkādu citu).

---

Wipe off the sticky layer using IBD Gelac gel cleanser (or any other brand you choose).
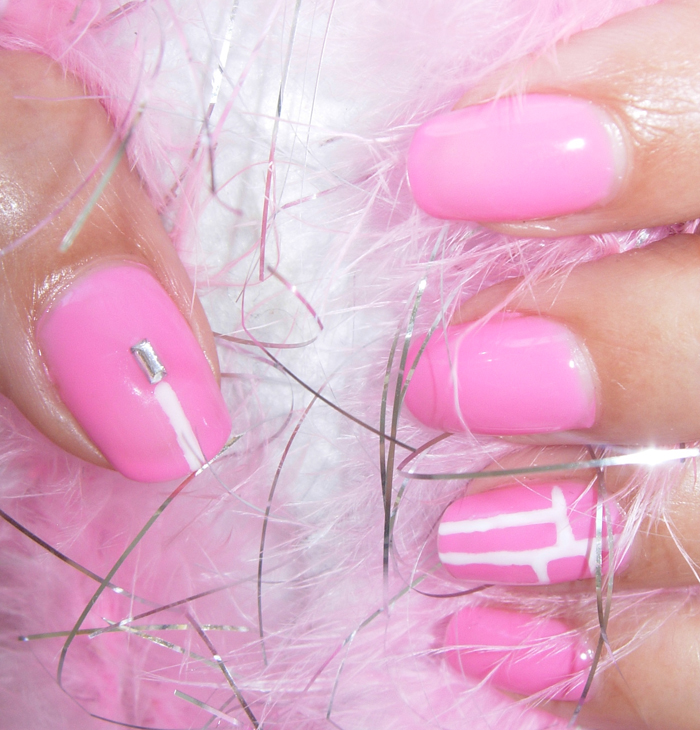
---

Rezultāts!/ Result!

Bluesky shellac nail design, nail art, pink with white stripes, nagu dizains, rozā, baltas svītras

Thursday, May 30, 2013

Jauns blogs/New blog

Sveiki! Radās ideja veidot savu blogu, kurā es dalīšos ar savu pieredzi par dažādām tēmām (pārsvarā skaistumkopšanas un nagu dizaina). Cerams Jums noderēs! :)

Hey! I’m creating a new blog where I will share my experience in nail art and beauty. Hope you’ll enjoy it! :)