Showing posts with label shellac manikīrs. Show all posts

Saturday, August 24, 2013

Green pop nail design

Mans šīs dienas manikīrs. :)

Šim nagu dizainam nepieciešamaisBluesky shellac bāzes nagu laka un virskārta, sarkana (Bluesky Wildfire)  un zaļgana (Bluesky Green Veraman) shellac nagu laka, zaļi un sarkani nagu spīdumi, zaļi un sarkani nagu dizaina stikliņi.

Sākam ar manikīru un bāzes nagu laku. Uzklājam zaļo un sarkano nagu laku, pēc tam otro kārtu. Sajaucam spīdumus ar caurspīdīgu nagu laku (Bluesky top coat). Liekam virsū stikliņus un ar mazu otiņu spīdumus un nožāvējam UV lampā. Pēdējais solis ir virskārta (Bluesky top coat), 2 kārtas uzklājam uz nagiem ar dizainu. Notīrām lipīgo slāni, uzklājam eļļiņu. Un gatavs!


---

My current manicure. :)

For this nail design you'll needBluesky shellac base and top coat nail polish, red (Bluesky Wildfire) and greenish (Bluesky Green Veraman) shellac nail polish, red and green nail art glitter, red and green nail art glass.

We're starting with manicure and then Bluesky base coat. Then apply color nail polishes and cure, then apply the second color coat. Mix glitter with Bluesky top coat. Add nail art glass and with a small brush dot the glitter and cure with UV lamp. Last step - Bluesky top coat ( 2 coats on the nails with design). Remove the sticky layer and apply some oil on your nails. And you're done! 


Green pop & red manicure, Bluesky shellac nail design, nail art glass, nail glitter, manicure, manikīrs, sarkans, zaļš, spīdumi

Sunday, August 11, 2013

Shellac Neon Lavender nail polish

Čau!

Nesen Ebayā pamanīju šo nagu laku un nevarēju atturēties... :P Kā Jums patīk?

Šim nagu dizainam nepieciešams: Bluesky shellac bāzes nagu laka un virskārta, lavandas krāsas nagu laka, sudraba nagu laka, nagu uzlīmes.

1.) Sagatavo nagus shellac uzklāšanai.
2.) Uzklāj bāzes nagu laku (Bluesky shellac base coat) un nožāvē UV lampā.
3.) Uzklāj plānu kārtu nagu lakas (Bluesky Neon Lavender) un nožāvē, pēc tam uzklāj otru kārtu šīs pašas nagu lakas un nožāvē.
4.) Uz augšējām maliņām uzklāj sudraba nagu laku (Bluesky Silver Chrome) un nožāvē, atkārto vēlreiz.
5.) Uz akcenta naga uzliek kādu nagu uzlīmi, es izvēlējos ar zvaigznītēm.
6.) Uzklāj virskārtu (Bluesky top coat) un nožāvē UV lampā. Atkārto uz akcenta naga.
7.) Notīri Shellac nagu lakas lipīgo slāni ar izvēlēto līdzekli.

---
Hi!

Found this nail polish on Ebay and couldn't resist.. :P What do you think?

For this nail design, you'll need: Bluesky shellac base and top coat nail polish, lavender color nail polish, silver nail polish, nail stickers.

1.) Prepare the nails.
2.) Apply thin coat of base nail polish (Bluesky shellac base coat) and let it dry (cure with UV lamp).
3.) Apply a thin coat of nail polish (Bluesky Neon Lavender) and cure it, then repeat this step.
4.) Add silver color nail polish (Bluesky Silver Chrome) and cure it, repeat this step.
5.) Add a nail sticker on the accent nail, I chose sticker with stars.
6.) Apply top coat (Bluesky) and cure with UV lamp. Repeat this step on accent nail.
7.) Remove the sticky layer.


Shellac Bluesky Neon Lavender nails, shellac neona nagu dizains, Bluesky shellac, nail sticker, Silver Chrome

Pink glitter nails/ Mirdzoši rozā nagi

Vienkāršs nagu dizains, joprojām izmantojot spīdumus..

Nepieciešamais: Bluesky shellac bāzes nagu laka un virskārta, gaiša shellac nagu laka pamatam, rozā un gaiši nagu spīdumi un dimantiņi.

1.) Sagatavo nagus shellac uzklāšanai.
2.) Uzklāj bāzes nagu laku (Bluesky shellac base coat) un nožāvē UV lampā.
3.) Uzklāj plānu kārtu gaišās nagu lakas (Bluesky Romantique) un nožāvē. 
4.) Sajauc caurspīdīgu nagu laku (Bluesky top coat) ar rozā un gaišiem spīdumiem un uzklāj uz nagiem.Nožāvē UV lampā. Atkārto šo punktu un uzliec dimantiņus, nožāvē UV lampā.
5.) Uzklāj virskārtu (Bluesky top coat) un nožāvē. Atkārto vēlreiz.
6.) Notīri Shellac nagu lakas lipīgo slāni ar izvēlēto līdzekli. Uzklāj nagiem eļļiņu.

---

Easy nail design, still using glitter...

You will need: Bluesky shellac base and top coat nail polish, light color nail polish for base color, pink and clear nail art glitter and rhinestones.

1.) Prepare the nails.
2.) Apply thin coat of base nail polish (Bluesky shellac base coat) and let it dry (cure with UV lamp).
3.) Apply a coat of the lighter nail polish (Bluesky Romantique) and cure it.
4.) Mix pink and clear glitter with Bluesky top coat nail polish and apply to nails. Cure with UV lamp. Repeat this step and add rhinestones. Cure with UV lamp.
5.) Apply top coat on your nails and cure. Repeat this step.
6.) Remove the sticky layer and apply oil on your nails.


Pink glitter nails, mirdzoši rozā nagi, nagu spīdumi, Bluesky, Romantique, shellac

Wednesday, July 17, 2013

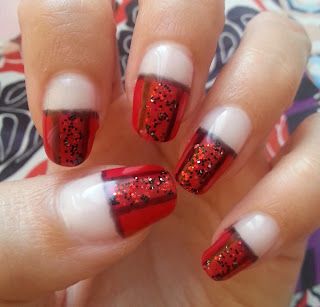
Red & glitter nail design

Vienkāršs sarkans ar melnu + spīdumi nagu dizains.

Lai izveidotu šādu dizainu, Tev būs nepieciešams: Bluesky shellac bāzes nagu laka un virskārta, gaiša shellac nagu laka pamatam, sarkana un melna shellac nagu laka, sarkani un melni nagu spīdumi.

1.) Sagatavo nagus shellac uzklāšanai.
2.) Uzklāj bāzes nagu laku (Bluesky shellac base coat) un nožāvē UV lampā.
3.) Uzklāj plānu kārtu gaišās nagu lakas (Bluesky Romantique) un nožāvē.
4.) Uzklāj sarkano nagu laku (Bluesky Wildfire), cik augstu vēlies, un nožāvē UV lampā. Atkārto šo punktu.
5.) Izmantojot  mazu nagu dizaina otiņu uzvelc melnas līnijas (Bluesky Black Pool) un nožāvē UV lampā.
6.) Sajauc caurspīdīgu nagu laku (Bluesky top coat) ar sarkaniem un melniem spīdumiem un uzklāj starp līnijām. Nožāvē UV lampā.
7.) Uzklāj virskārtu (Bluesky top coat) uz visa naga (neaizmirsti arī nagu maliņas) un nožāvē. Atkārto vēlreiz.
8.) Notīri Shellac nagu lakas lipīgo slāni ar izvēlēto līdzekli. Uzklāj nagiem eļļiņu.


---

Simple red & black + glitter nail design.

To create this nail design you'll need: Bluesky shellac base and top coat nail polish, light color nail polish for base color, red & black shellac nail polishes, red & black nail art glitter.

1.) Prepare the nails.
2.) Apply thin coat of base nail polish (Bluesky shellac base coat) and let it dry (cure with UV lamp).
3.) Apply a coat of the lighter nail polish (Bluesky Romantique) and cure it.
4.) Apply red nail polish (Bluesky Wildfire) and cure it. Repeat this step.
5.) Using nail design brush draw black lines (Bluesky Black Pool) and cure them.
6.) Mix red and black glitter with Bluesky top coat nail polish and apply in the middle. Cure with UV lamp.
7.) Apply top coat (Bluesky) on your nails (don't forget the nail edge) and cure. Repeat this step.
8.) Remove the sticky layer and apply oil on your nails.


shellac nail design, Bluesky, Wildfire, glitter, Black Pool, Romantique, red and black nail art

Thursday, June 27, 2013

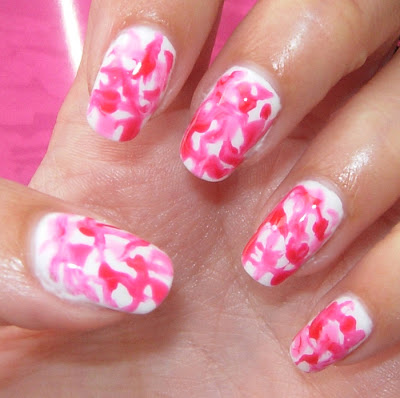
Krāsu mix nagu dizains/ Splash nail art

Čau!

Šonedēļ vēlējos gaišu, bet krāsainu nagu dizainu. Lūk, kas man sanāca. :)

Nepieciešamais: Bluesky shellac bāzes nagu laka un virskārta, gaiša shellac nagu laka pamatam, trīs līdzīgu toņu shellac nagu lakas.

1.) Sagatavo nagus shellac uzklāšanai.
2.) Uzklāj bāzes nagu laku (Bluesky shellac base coat) un nožāvē UV lampā.
3.) Uzklāj plānu kārtu gaišās nagu lakas (Bluesky Studio white) un nožāvē. Tad atkārto šo punktu vēlreiz.
4.) Ar nagu lakas otiņu saliec punktiņus, izmantojot 3 nagu lakas. Es izmantoju Bluesky Hot Chillis (sarkani oranžīga krāsa), Wildfire (klasiski sarkana), Gotchya (gaiši rozā). Izmantojot  mazu nagu dizaina otiņu sapludini krāsas un nožāvē UV lampā.
5.) Uzklāj virskārtu (Bluesky top coat) uz visa naga (neaizmirsti arī nagu maliņas) un nožāvē.
6.) Notīri Shellac nagu lakas lipīgo slāni ar izvēlēto līdzekli. Uzklāj nagiem eļļiņu.

---

Hey!

This week I wanted light, but colorful nail design, so this is what I came up with. :)

You'll need: Bluesky shellac base and top coat nail polish, light color nail polish for base color, three similar color shellac nail polishes.

1.) Prepare the nails.
2.) Apply thin coat of base nail polish (Bluesky shellac base coat) and let it dry (cure with UV lamp).
3.) Apply a coat of the lighter nail polish (Bluesky Studio White) and cure it, then repeat this step.
4.) Apply dots of your 3 nail polishes with nail polish brush. I used Bluesky Hot Chillis (watermelon color), Wildfire (classic red), Gotchya (bright baby pink). With small nail art brush mix the color dots and cure in UV lamp.
5.) Apply top coat (Bluesky) on your nails (don't forget the nail edge) and cure.
6.) Remove the sticky layer and apply oil on your nails.


Bluesky shellac nail polish, Studio white, Gotchya, Wildfire, Hot Chillis, colorful, shellac manikīrs, krāsains nagu dizains


Thursday, June 20, 2013

Vienkāršs nagu dizains/ Simple nail design

Sveikas!

Mans šīs nedēļas Shellac manikīrs - balts & zils nagu dizains.

Nepieciešamais: Bluesky shellac bāzes nagu laka un virskārta, gaiša shellac nagu laka pamatam, tumša shellac nagu laka un nagu spīdumi (pieskaņoti tumšajai nagu lakai).

1.) Sagatavo nagus shellac uzklāšanai (novīlēt, var nospodrināt ar nagu buferi utt.).
2.) Uzklāj bāzes nagu laku (Bluesky shellac base coat) un nožāvē UV lampā.
3.) Uzklāj plānu kārtu gaišas nagu lakas (Bluesky Studio White) un nožāvē, pēc tam uzklāj otru kārtu šīs pašas nagu lakas un nožāvē.
4.) Uzklāj tumšo nagu laku vēlamajā augstumā (Bluesky Midnight Swim) un nožāvē, atkārto vēlreiz.
5.) Sajauc uz lapiņas caurspīdīgu nagu laku (Bluesky top coat) ar ziliem nagu spīdumiem un uzklāj uz nagiem, nožāvē.
6.) Uzklāj virskārtu (Bluesky top coat) uz visa naga un nožāvē UV lampā.
7.) Notīri Shellac nagu lakas lipīgo slāni ar izvēlēto līdzekli.
8.) Uzklāj uz nagiem eļļu (es lietoju mandeļu eļļu vai bišu vaskus, kas nopērkami Drogās).

---

Hi!

This weeks Shellac manicure - white & blue nail design.

You'll need: Bluesky shellac base and top coat nail polish, light color nail polish for base color, darker shellac nail polish and nail glitter (matching the darker nail polish).

1.) Prepare the nails (manicure, cuticles, buff them etc.).
2.) Apply thin coat of base nail polish (Bluesky shellac base coat) and let it dry (cure with UV lamp).
3.) Apply a coat of the lighter nail polish (Bluesky Studio White) and cure it, then repeat this step.
4.) Apply the darker nail polish (Bluesky Midnight Swim) and cure it, repeat this step.
5.) Mix clear nail polish (Bluesky top coat) with nail glitters and apply on the dark nail polish, cure it.
6.) Apply top coat (Bluesky) on your nails and cure with UV lamp.
7.) Remove the sticky layer.
8.) Apply oil on your finished nails (I'm using almond oil).


white & blue nail design, Blats & zils nagu dizains, shellac, Bluesky, Midnight Swim, Studio White, glitter

Wednesday, June 5, 2013

Rozā nagu dizains/ Pink nail design

Čau visiem!

Beidzot ir pienācis tas brīdis, kad var ķerties klāt interesantākajai daļai par Shellac manikīru - nagu krāsošanai!

Šis ir mans pirmais raksts par Shellac nagu lakas uzklāšanu, tāpēc pastāstīšu kā tas jādara soli pa solim.


---

Hello all!

Finally we can  get to the interesting part about Shellac manicure - applying.

This is my first post about how to apply Shellac nail polish, so I'll give you step by step instructions.


---


1.solis/ Step 1.

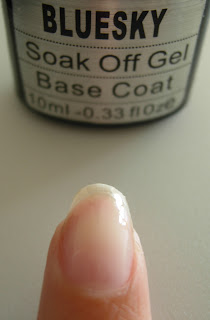
Bluesky shellac base coat, shellac bāzes nagu laka

Uz tīra naga uzklājam plānu kārtu Bluesky shellac bāzes nagu lakas. Svarīgi nagu laku klāt, lai tā nepieskartos  ādai (atstājot nelielas nenokrāsotas maliņas nagu augšpusē un sānos). Uzklājam nagu laku arī uz nagu galiem (tas attiecas uz visiem nagu lakas slāņiem, kurus jākrāso). Tad liekam nagus UV lampā uz 2 min (LED lampā uz 30-60 s).

---

Apply thin layer of Bluesky shellac base coat to clean nails. It's important to paint all nail polish layers so that it doesn't touch your skin. Also apply nail polish to the nail edge (this is required for all nail polish layers you'll apply). Cure it for 2 min with UV lamp (30-60 s with LED lamp).


shellac curing, UV lamp

2.solis/ Step 2.

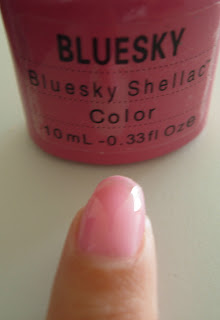
Bluesky shellac nail polish Gotchya, shellac nagu laka

Uzklājam plānu kārtu Bluesky shellac krāsainās nagu lakas. (Uzmanīgi nepieskaroties ādai!) Es izmantoju Bluesky shellac nagu laku "Gotchya". Un liekam UV lampā.

---

Apply thin layer of Bluesky shellac color nail polish. (Careful not to touch your skin!) I'm using Bluesky shellac nail polish "Gotchya". And cure with UV lamp.

---

3.solis/ Step 3.

Bluesky shellac nail polish Gotchya second layer

Uzklājam otru kārtu krāsainās nagu lakas. Un atkal liekam UV lampā uz 2 min.

---

Apply second layer of color nail polish. And again cure for 2 min with UV lamp.

---

4.solis/ Step 4.

Bluesky nail polish Gotchya and Studio white

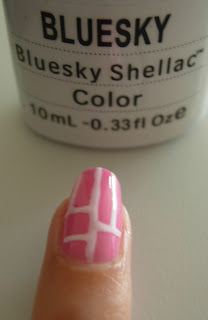
Uzvelkam strīpas ar Bluesky shellac nagu laku "Studio white". Un liekam nagus UV lampā.

---

Draw lines with Bluesky nail polish "Studio white". And cure with UV lamp.

---

5.solis/ Step 5.

Bluesky top coat, virskārta

Uzklājam pēdējo nagu lakas kārtu - virskārtu. Šo kārtu klājam nedaudz biezāku. Un pēdējo reizi liekam UV lampā. Padoms: Ērtāk vispirms nokrāsot vienas rokas nagus un tad ķerties klāt otrai rokai.

---

Apply the last nail polish coat - Bluesky top coat. This layer can be a bit thicker than the last ones. And cure for the last time with UV lamp. Tip: It's better to finish applying shellac to one hand and then start painting the other hand.

---

6.solis/ Step 6.

Bluesky shellac Gotcha after curing, shellac nagu lakas lipīgā slāņa noņemšana

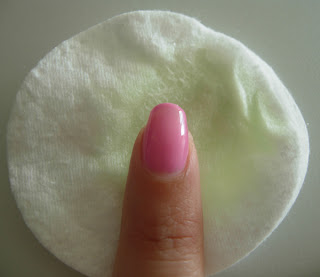
Notīrām nagus ar lipīgā slāņa noņēmēju (IBD Gelac gel cleanser vai jebkādu citu).

---

Wipe off the sticky layer using IBD Gelac gel cleanser (or any other brand you choose).

---

Rezultāts!/ Result!

Bluesky shellac nail design, nail art, pink with white stripes, nagu dizains, rozā, baltas svītras

Friday, May 31, 2013

Kāpēc izvēlēties Bluesky shellac?/Why choose Bluesky shellac?

Sveikas meitenes, kuras ieinteresēja Shellac manikīrs!

Šodien es Jums pastāstīšu, kāpēc es izvēlējos tieši šo manikīru un Bluesky shellac nagu lakas. :)


---

Hey, girls who's interested in Shellac manicure!

Today I'll tell you, why I chose this manicure and Bluesky shellac nail polishes. :)


---

Nedaudz par maniem nagiem, kādi tie bija pirms es sāku lietot Bluesky shellac...
Es nebiju apmierināta ar savu nagu izskatu, jo tie bija diezgan plāni un šķēlās. Līdz ar to es nevarēju izaudzēt garus nagus, kādus es vienmēr biju vēlējusies. :( 
Nagu pieaudzēšana mani nesaistīja, jo ir bijusi slikta pieredze, kā arī katru mēnesi maksāt no 10 Ls par Gelish vai Shellac manikīru salonos, likās samērā dārgi. Turklāt, parastās nagu lakas nācās pārlakot ik pēc 2-3 dienām.. Nu kuram tam ir laiks?! Tad nu es izlēmu vērsties pie labās fejas Googles un arī atradu, kā atvieglot savu dzīvi! (yee!)


---

Before we start the review, some info about my nails before I started to use Bluesky shellac...
I wasn't satisfied how my nails looked, because they were thin and had a tendency to split. Because of that, I couldn't grow long nails that I always have wanted. :(
I didn't want nail extensions, because I've had a bad experience with them, also I didn't want to pay every month for Gelish or Shellac manicures, because it's rather expensive. Also, I had to redo manicure with regular nail polishes every 2-3 days. Who has time for that?! So I decided to seek for help to good fairy Google and I found my solution! (yeey!)


---

Tagad par pašu Bluesky shellac.
Bluesky shellac ir ekonomiskāka shellac nagu laku versija (salīdzinot ar oriģinālo CND shellac, ko lieto salonos). Shellac manikīrs no Gelish atšķiras ar to, ka tas ir elastīgāks un plānāk uzklājas nekā Gelish, kā arī pirms Shellac uzlikšanas nav jānopulē nagu virskārta (ko, manuprāt, plānu nagu īpašnieces nevar atļauties).
Lai vieglāk saprast, es uzskaitīšu visus plusus un mīnusus Bluesky shellac nagu lakām.

PLUSI:
  • Cena (viena nagu lakas pudelīte maksā ap 5 Ls (10 ml), salīdzinot ar CND shellac, kur viena pudelīte maksā ap 10 Ls (7.5 ml), bet mums taču patīk krāsu dažādība!)
  • Nav nepieciešama speciāla UV lampa (ar CND shellac viņi rekomendē izmantot viņu firmas lampu, kura ir salīdzinoši dārga)
  • Viegla uzklāšana
  • Salīdzinot ar parastajām nagu lakām, gaidot nožūšanu, nevari paspēt kaut ko sabojāt
  • Krāsu ziņā gandrīz tāda pati izvēle kā CND shellac nagu lakām
  • Gluds un spīdīgs gala rezultāts
  • Mani nagi aug un nelūzt (ja vien es pati ļoti neveikli tos nenolaužu.. kam negadās)!
  • Pēc kāda laiciņa, mani nagi ir pārstājuši šķelties
MĪNUSI:
  • Latvijā nevar nopirkt, vismaz neesmu redzējusi, tāpēc pasūtu no Ebay.com, gaidīšanas laiks apmēram 10 dienas (pasūtu no pārdevēja Eiropā)
  • Aizņem kādu laiciņu. Jālako 4 nagu lakas kārtas (nožūšana katrai kārtai ir 2 min), taisot pašai, vispirms jānolako viena roka, tad otra, tātad 16 min aizņem nagu lakas žūšana + laiks, kas jāpavada lakojot nagus, kur nu vēl, ja krāso kādu sarežģītāku dizainu. Kā arī laiku aizņem sagatavošanās lakošanai (iepriekšējās nagu lakas noņemšana, manikīrs)
  • Ja Tev ir nagi, kuri šķeļas, tad sākumā šī nagu laka neturēsies tik ilgi un atsevišķiem nagiem var "atlipt" krāsa. (bet, kā jau es minēju, pēc kāda laiciņa, lietojot šo nagu laku, mani nagi pārstāja šķelties)
NE PLUSS, NE MĪNUSS:
  • Uz nagiem (bez krāsas "atlipšanas") turas apmēram 8-14 dienas, bet tas ir arī atkarīgs no tā, ko Jūs darāt ar savām rociņām. Šo citi varētu uzskatīt par mīnusu, bet es nē, jo man pašai apniktu ilgāk par 2 nedēļām staigāt ar vienu un to pašu nagu dizainu. Šeit vēl varu piebilst, ka uz kāju nagiem Bluesky shellac nagu laka turas apmēram mēnesi, tā kā par pedikīru uz kādu laiciņu var aizmirst.
---

Now on to the Bluesky shellac review.
Bluesky shellac is a cheaper version of the original CND shellac nail polish (witch is used at beauty salons). Shallac manicure differs from Gelish - it's more elastic on nails, looks thinner on nails, also you don't have to buffer your nails before each application (girls with think nails can't afford that luxury). I'll list all the pros and cons of Bluesky shellac nail polishes.

 PROS:
  • Price (one Bluesky nail polish bottle costs around 9$ (10 ml), whereas CND shellac bottle costs around 15$ (7.5 ml))
  • You don't need a special UV lamp (with CND shellac they recommend to use their lamp for better results, witch is rather expensive)
  • Simple application
  • In comparison with regular nail polishes, you can't ruin your manicure while waiting for it to dry
  • You have almost the same colour selection as CND shellac
  • Smooth and shiny result
  • My nails grow and don't break (if I don't break them with my clumsiness..)
  • After a while of using this product my nails doesn't split anymore
CONS:
  • Takes time (16 min drying time in UV lamp + time you spend applying colours). Also the time you spend preparing for Shellac manicure (removing old polish, manicure)
  • If you have nails that tends to split, the durability of this nail polish on some nails will be shorter in first application times (but, as I said, may nails stopped splitting after a short while of using Shellac)
NEITHER PRO OR CON:
  • Bluesky nail polish stays intact (without chipping) for 8-14 days, but it depends on what you do with your hands. Some may think this is a con - not me, because it's boring to have the same nail design for longer that 2 weeks. To add in, on toe nails Bluesky shellac manicure holds up for 4 weeks, so you can forget about pedicure for some while.

---

Nu tā... Izskatās, ka es te tik esmu saslavējusi Bluesky shellac nagu lakas, bet mani tās tiešām apmierina. Mājas apstākļiem ļoti labs variants un vairs nav jāstreso par to, vai mana nagu laka nav nogājusi un izskatās labi. Kā Jums šķiet? :)


---

Well... It looks like I'm praising Bluesky shellac nail polishes, but I'm really satisfied with them and the quality. It's very convenient to use at home and you don't have to worry weather your nail polish isn't chipped and looks good. What do you think? :)


Thursday, May 30, 2013

Dari pati: shellac manikīrs/DIY: shellac manicure

Sveikas!
Vai esat kādreiz domājušas, cik naudas Jūs varētu ietaupīt, ja tā vietā, lai pieaudzētu nagus vai lakotu Gelish un Shellac nagu lakas salonos, Jūs to darītu pašas savās mājās? Atbilde ir - daudz!
---
Hi!
Have you ever thought how much money you could save, if you did your manicure at  home instead of beauty salons? I've got the answer - a lot!


necessary for shellac manicure, vajadzīgais shellac manikīram

Kas Jums nepieciešams, lai sāktu:
1.) UV vai LED lampa. Vajadzētu būt vismaz 36W. Ebay.com ir liela izvēle. Izmaksas no 12 Ls.
2.) Bluesky shellac starta komplekts (bāzes nagu laka, virskārta, dažādu krāsu nagu lakas). Arī var iegādāties Ebay.com vai Amazon.com. Izmaksas no 15 Ls.
3.) Lipīgā slāņa noņēmējs. Es izmantoju IBD Gelac gel cleanser. Iegādājos ŠEIT.
4.) Nagu lakas noņēmējs. Izmantoju IBD Gelac gel remover. Pirku tajā pašā veikalā, kur lipīgā slāņa noņēmēju. Komplektā šie abi maksāja 7.50 Ls.
5.) Manikīra komplekts, kas noteikti Jums jau ir.

Kopējās izmaksas 34.50 Ls pret Gelish vai Shellac manikīru salonā sākot no 10 Ls par reizi! Diezgan izdevīgi, vai ne? :)


---

What you need to get started:
1.) UV or LED lamp. You should choose at least 36W lamp. There's a wide range on Ebay.com. Costs from 24$.
2.) Bluesky shellac start kit (base coat, top coat and color nail polishes). You can find them on Ebay.com or Amazon.com. Costs from 30$.
3.) Sticky residue remover. I'm using IBD Gelac gel cleanser. (on Ebay.com 11.50$)
4.) Gel nail polish remover. I'm using  IBD Gelac gel remover. (on Ebay.com 7$)
5.) Manicure set, witch you already have.

Total costs: 72.50$ Pretty convenient, don't you think? :)

---

Cerams Jums patika šis raksts un rosināja vēlmi pašām izmēģināt Shellac manikīru! Nākošajos rakstos pastāstīšu, kāpēc izvēlos Bluesky shellac nagu lakas un kā tās lietot.

---

I hope you liked my post and you decide to try it yourself! In my next posts, I'll tell why I choose Bluesky shellac and how to use it.